Sled Push and Pull: Technique That Saves Minutes, Not Seconds
The two stations with the widest spread of times between athletes of similar fitness, because both are heavily technical. Body position, step length, rope mechanics, and why floor friction varies so much between venues.
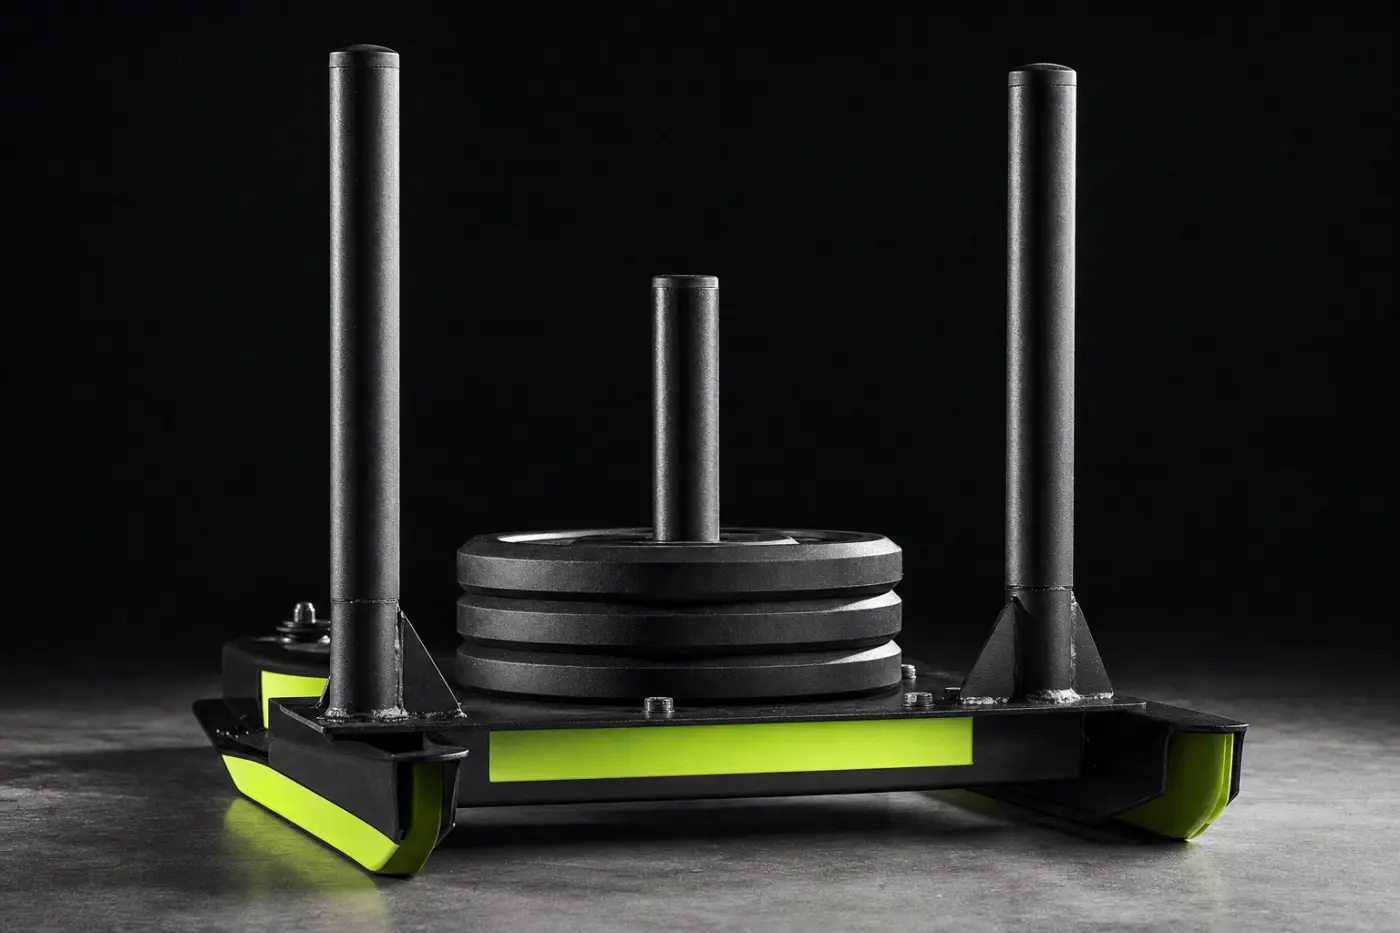
- These two stations have the widest time spread of any in the race, and it is mostly technique.
- Low body angle, short steps, constant contact. Never let the sled stop.
- On the pull, use your legs and bodyweight, not your arms.
- Floor friction varies enormously between venues — expect it and adapt.
- Train them heavy, because race weight will feel heavier than you expect.
If you compare two HYROX athletes with similar running times and similar strength, the largest single difference in their finishing times will frequently come from the sleds.
Not because one is stronger. Because one knows how to move a sled and the other is fighting it.
These are the two most technical stations in the race, they come early enough to wreck everything downstream, and the spread of times between athletes of equivalent fitness is measured in minutes.
Why the spread is so wide
Friction is not linear with effort. Getting a stationary sled moving requires substantially more force than keeping a moving one moving. An athlete who stops five times pays that cost five times, and each restart also spikes the heart rate.
Body angle changes the direction of your force. Push at the wrong angle and a meaningful share of your effort goes into the floor rather than into the sled. This is geometry, not fitness, and no amount of strength compensates for it.
It comes early and it is expensive. The sled push is the second station and the pull is the third. An athlete who redlines here carries the damage through six more stations and six more kilometres — and it usually presents at the wall balls.
The push
Body position
Low. The most common error is standing too upright, and it is costly.
- Arms extended or nearly extended. Bent arms turn this into an upper-body exercise you will lose
- Straight line from hands through hips to heels. No piking at the hips, no sagging
- Torso angled forward, around 45 degrees or lower. The lower you can get while still driving effectively, the more of your force goes horizontally
- Head neutral, eyes a few metres ahead rather than at your feet
The test: if a sideways photograph shows you looking like you are pushing a broken-down car, you are correct. If it shows you standing behind the sled shoving it, you are giving away force.
Hand placement
High on the uprights for most athletes, low if the sled is very heavy relative to your strength. Lower hands transmit force more directly into the base but restrict how much you can extend your body.
Experiment in training rather than deciding on race day.
The steps
Short and frequent. Not long and powerful.
Long strides create a stop-start rhythm — a big push, a pause while you reposition, another big push. The sled decelerates in each pause and you pay the restart cost every time.
Short choppy steps with constant ground contact keep continuous pressure on the sled. It looks less impressive and it is considerably faster.
Drive through the whole foot, not the toes. Toe-driving on a smooth floor is how you slip, and a slip costs you the momentum you had built.
The single biggest thing
Do not let it stop.
If you must rest, slow down while still moving rather than stopping fully. A crawl is nearly always better than a stop, because you never pay to overcome static friction again.
If you genuinely have to stop, make it deliberate and short — five seconds, then restart with a hard drive rather than easing into it.
The pull
Different problem entirely, and the one people get most wrong.
Position
Sit back. Your bodyweight is doing the work, not your arms.
- Feet planted wide, weight through the heels
- Hips low, sitting back against the rope
- Arms relatively straight during the pull, acting as cables rather than motors
- Lean back and let your mass and legs generate the tension
The error: standing tall and pulling hand over hand with the arms. Forearms and biceps are small muscles, they fatigue very quickly, and you still have a grip-dependent station later — the wider issue is in grip strength.
The technique
Hand over hand, long pulls. Reach far, pull to your body, reach again. Fewer and longer beats many and short.
Keep the rope moving. Same principle as the push — a moving sled is cheaper than a stopped one.
Manage the slack. The rope piles up around your feet and becomes a tripping hazard and a delay. Pull it to one side as you go, deliberately, rather than dealing with it when it becomes a problem.
Alternate your leading side if you can, to distribute the fatigue.
Where to stand
You are typically pulling from within a marked box. Set up so you have room to sit back and use your full range, rather than crowding the front and pulling with your arms because there is nowhere to go.
The friction problem
This surprises people at their first race.
The same nominal weight feels wildly different between venues. Flooring differs, and the coefficient of friction between the sled base and the surface can vary enormously. Temperature and humidity affect it. So does how many hundreds of times the sled has been dragged across that same lane already that day.
What to do about it:
- Watch the athletes ahead of you. A minute of observation tells you whether this is a fast floor or a slow one
- Adjust your expectation, not your effort. If it is slow, everyone is slow. Your placing does not suffer; your split does
- Do not panic in the first five metres. If it feels impossibly heavy, that is information about the floor, not about your fitness
- Train on varied surfaces if you can, so a heavy floor is familiar rather than alarming
Training them
Push:
- Heavy sled pushes, 15 to 25 m, in sets of 4 to 6 with short rests. Heavier than race weight where possible
- Attach the run. 400 m, then a push. The transition from running to pushing with a raised heart rate is its own skill
- Underlying strength: heavy squats, split squats, leg press. Force production is the base that technique sits on — implement choices are in trap bar vs barbell vs dumbbells
Pull:
- Rope pulls if you have the setup. If not, heavy seated rows, sled drags with a strap, and heavy hinging
- Grip and back work — pull-ups, rows, carries. Pull-up progression doubles as pull preparation
- Practise slack management. It sounds trivial and it costs real seconds
No sled at your gym? Push a loaded car park trolley, drag a weight plate on a towel, use a treadmill with the motor off. All imperfect, all better than arriving having never done it.
Race-day sequencing
Arrive controlled. The runs before the sleds should be comfortably paced. Arriving at the push already breathing hard means you will stop, and stopping is the expensive thing.
Expect the heart rate spike. The sled pushes it higher than anything else in the race. Plan the following run as a recovery segment rather than trying to hold your target pace immediately.
Do not race the person next to you. Athlete-to-athlete variation at the sleds is enormous and tells you nothing useful about your own race.
The summary
Get low, take short steps, and never let it stop. Sit back on the pull and use your legs. Manage the rope. Expect the floor to be different from the one you trained on.
These are the two stations where technique is worth more than fitness, which means they are the two where a training session spent on positioning returns more than a session spent getting fitter. Most athletes have that backwards.
Questions people ask
How do you push a heavy sled faster?
Get your body low with a long line from hands to heels, take short and frequent steps, and keep constant pressure so the sled never stops. Restarting a stationary sled costs far more energy than keeping a moving one moving, so the single biggest time saving is simply not stopping.
What is the best body position for a sled push?
Arms extended or nearly extended, torso angled forward at roughly 45 degrees or lower, with a straight line from hands through hips to heels. Standing too upright directs your force into the ground rather than horizontally into the sled, which is the most common and most expensive error at this station.
How do you pull a sled rope efficiently?
Sit back into your heels and use your bodyweight and legs rather than pulling with your arms. Take long hand-over-hand pulls with a wide base, keep the rope moving continuously, and manage the slack so you are never stopping to gather it. Arms fatigue quickly; legs and bodyweight do not.
Why does the sled feel heavier at some races?
Floor surface and friction vary substantially between venues, and the same nominal weight can feel dramatically different on different flooring. Temperature, humidity and how much the sled has been used that day also matter. Judge the effort by feel on the day rather than by what the number says.
How should you train for the sled?
Heavier than race weight where your facility allows, in short repeated efforts with the run element attached, since you will meet the sled with a raised heart rate. Build the underlying strength with heavy squats, split squats and leg press, and rehearse the transitions from running into pushing.
Keep reading

HYROX for Women: What Differs and What Doesn't
Different loads and rep counts, a different balance of limiting factors, and a lot of training advice written for someone else. Where the demands genuinely differ, where they do not, and what that means for how you train.

Wall Balls: The Station That Decides Your Last Ten Minutes
The final station, the one most likely to fall apart, and the one where a rehearsed set structure is worth minutes. Technique that saves your shoulders, how to break the reps, and what to do when the reps start getting no-repped.
The SkiErg and Rower: A Technique Guide for People Who Lift
Strong athletes are routinely slow on both machines because they muscle them. The sequencing that makes each efficient, damper and drag factor settings that actually matter, and the pacing that keeps your legs for the next run.